The Profile of the Surface Finish of the Wire Can be of Crucial Importance to the Manufacture and Performance of the Fabricated Wire Parts
Excepting metallurgical flaws normally associated with casting defects and mechanical damage caused by handling, the surface of the wire is a function of the working surfaces, rolls and dies used in processing the wire. The best measure of the surface finish of these working surfaces is to measure the surface of the wire with a profilometer, an instrument designed for this purpose. Because of the small width and different shapes inherent to wire, the most reliable measurements are done at the center of the wire and then profiled down a specified length of the wire. Specifications for surface finish are derived from the measurement scale used.
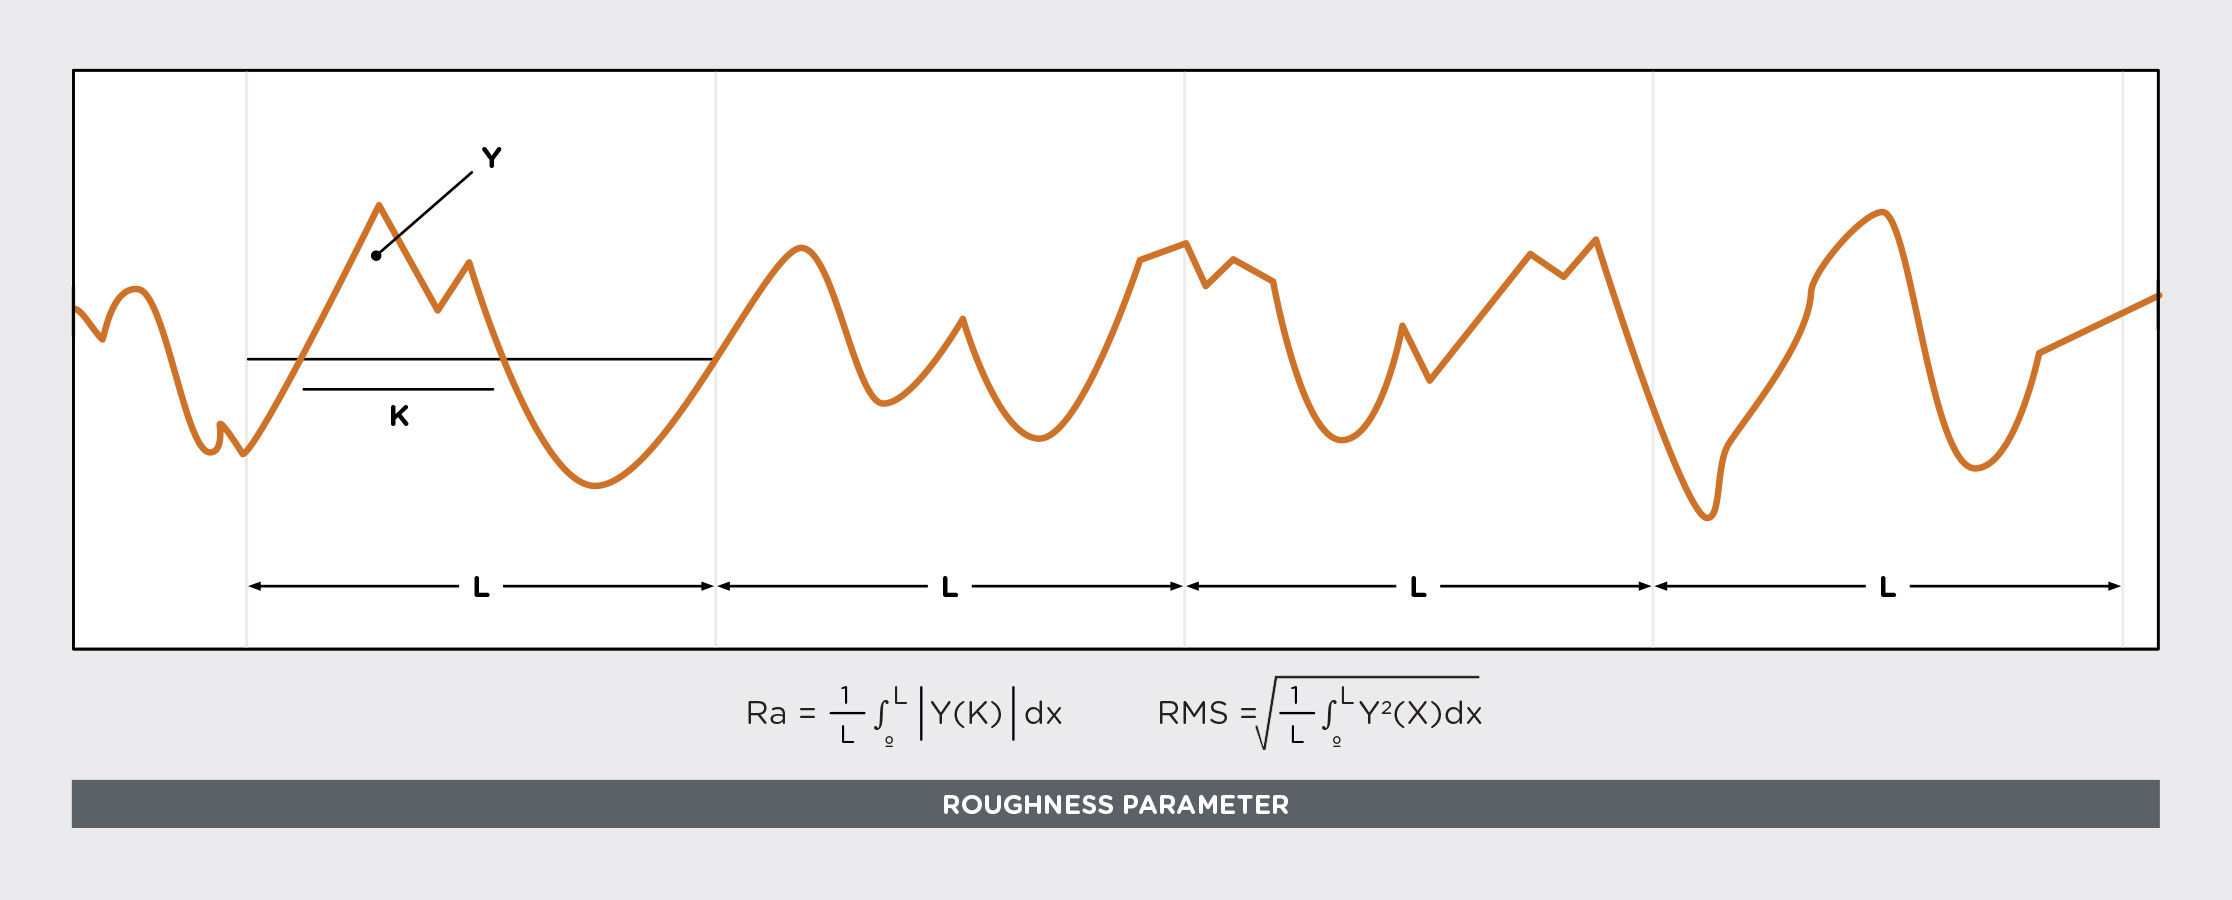
Of the three common scales shown here the specification value most often employed for wire is the root mean squared (RMS), the standard deviation of the arithmetic mean value Ra.
Ra
Ra is the universally recognized parameter of roughness. It is the arithmetic mean of the departures (Y) of the profile from the mean line. It is normally determined as the mean result of several consecutive sampling lengths (L).

Rz
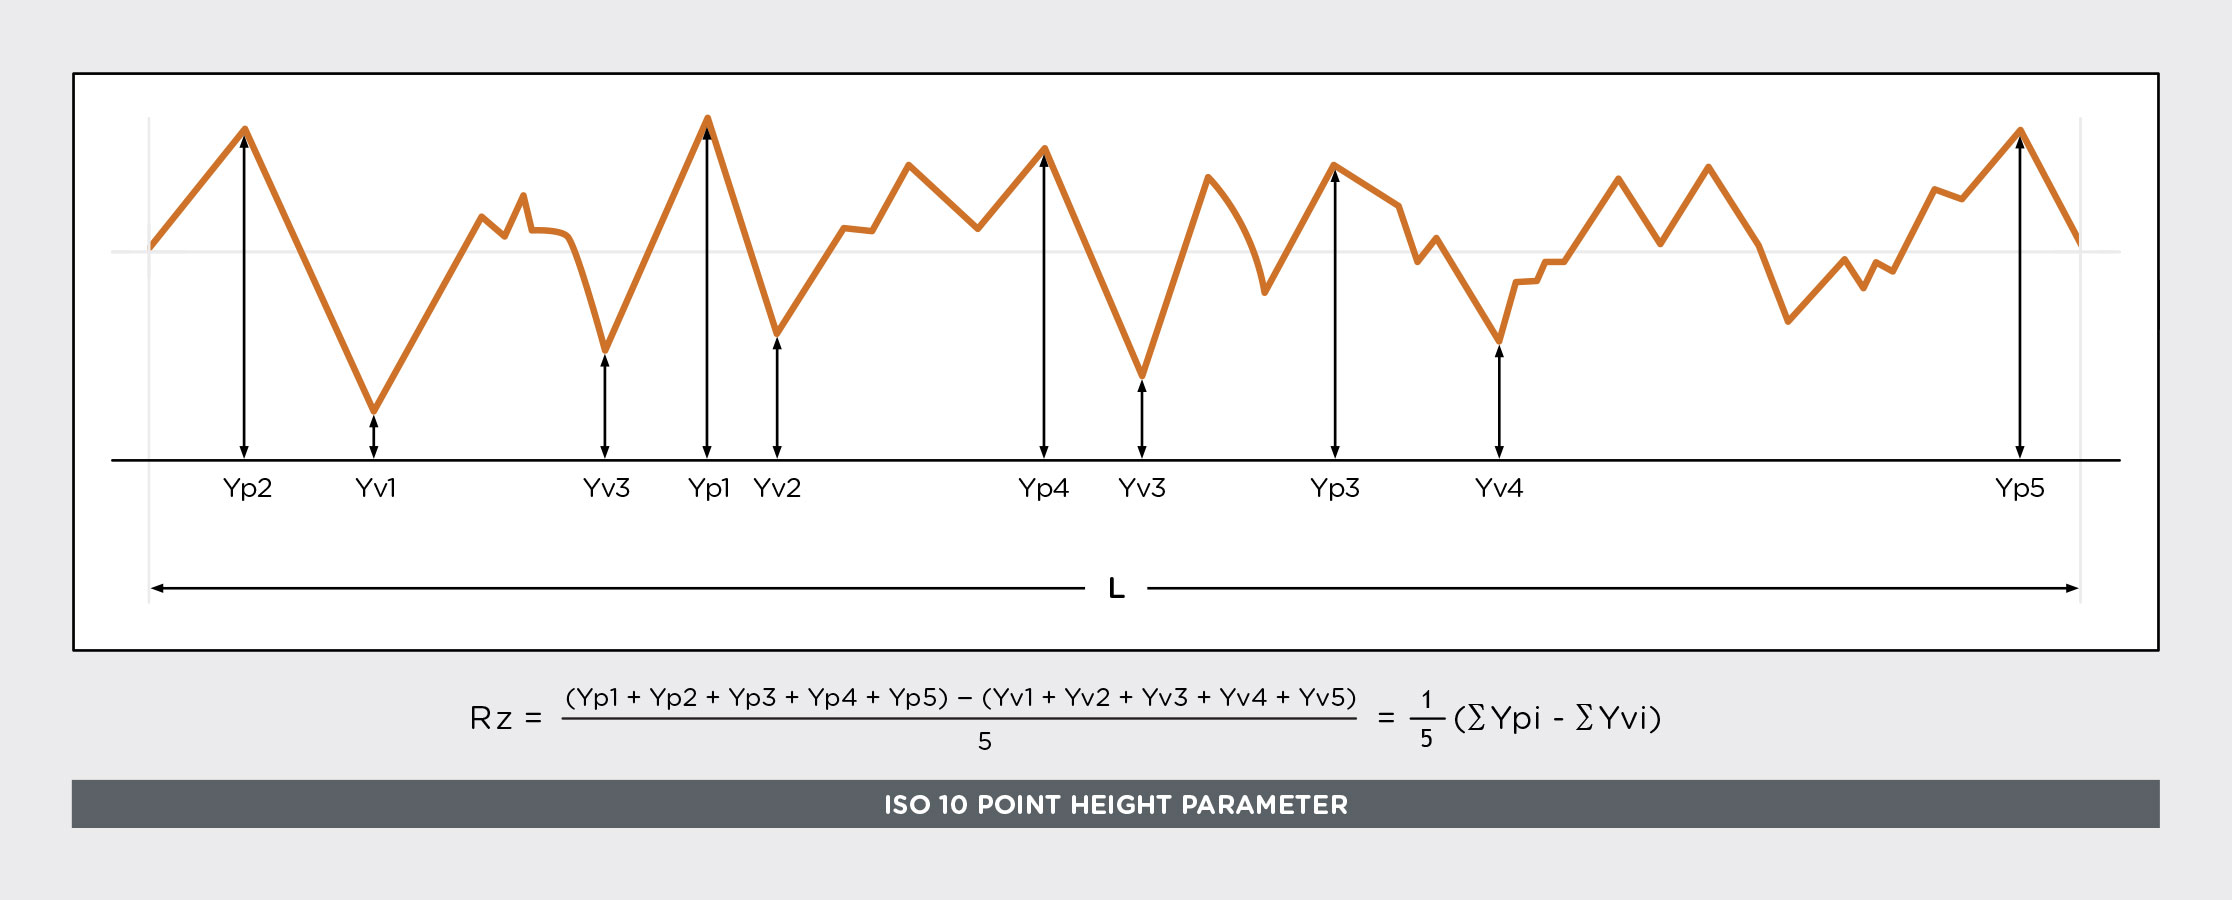
Rz is known as the ISO 10-point height parameter. It is measured over a single sampling length and is itself an average of several peak values; it is a useful parameter when only a short length of surface is available for sampling. Numerically it is the average height difference between the five highest peaks and the five lowest valleys within the sample length (L).

Rt
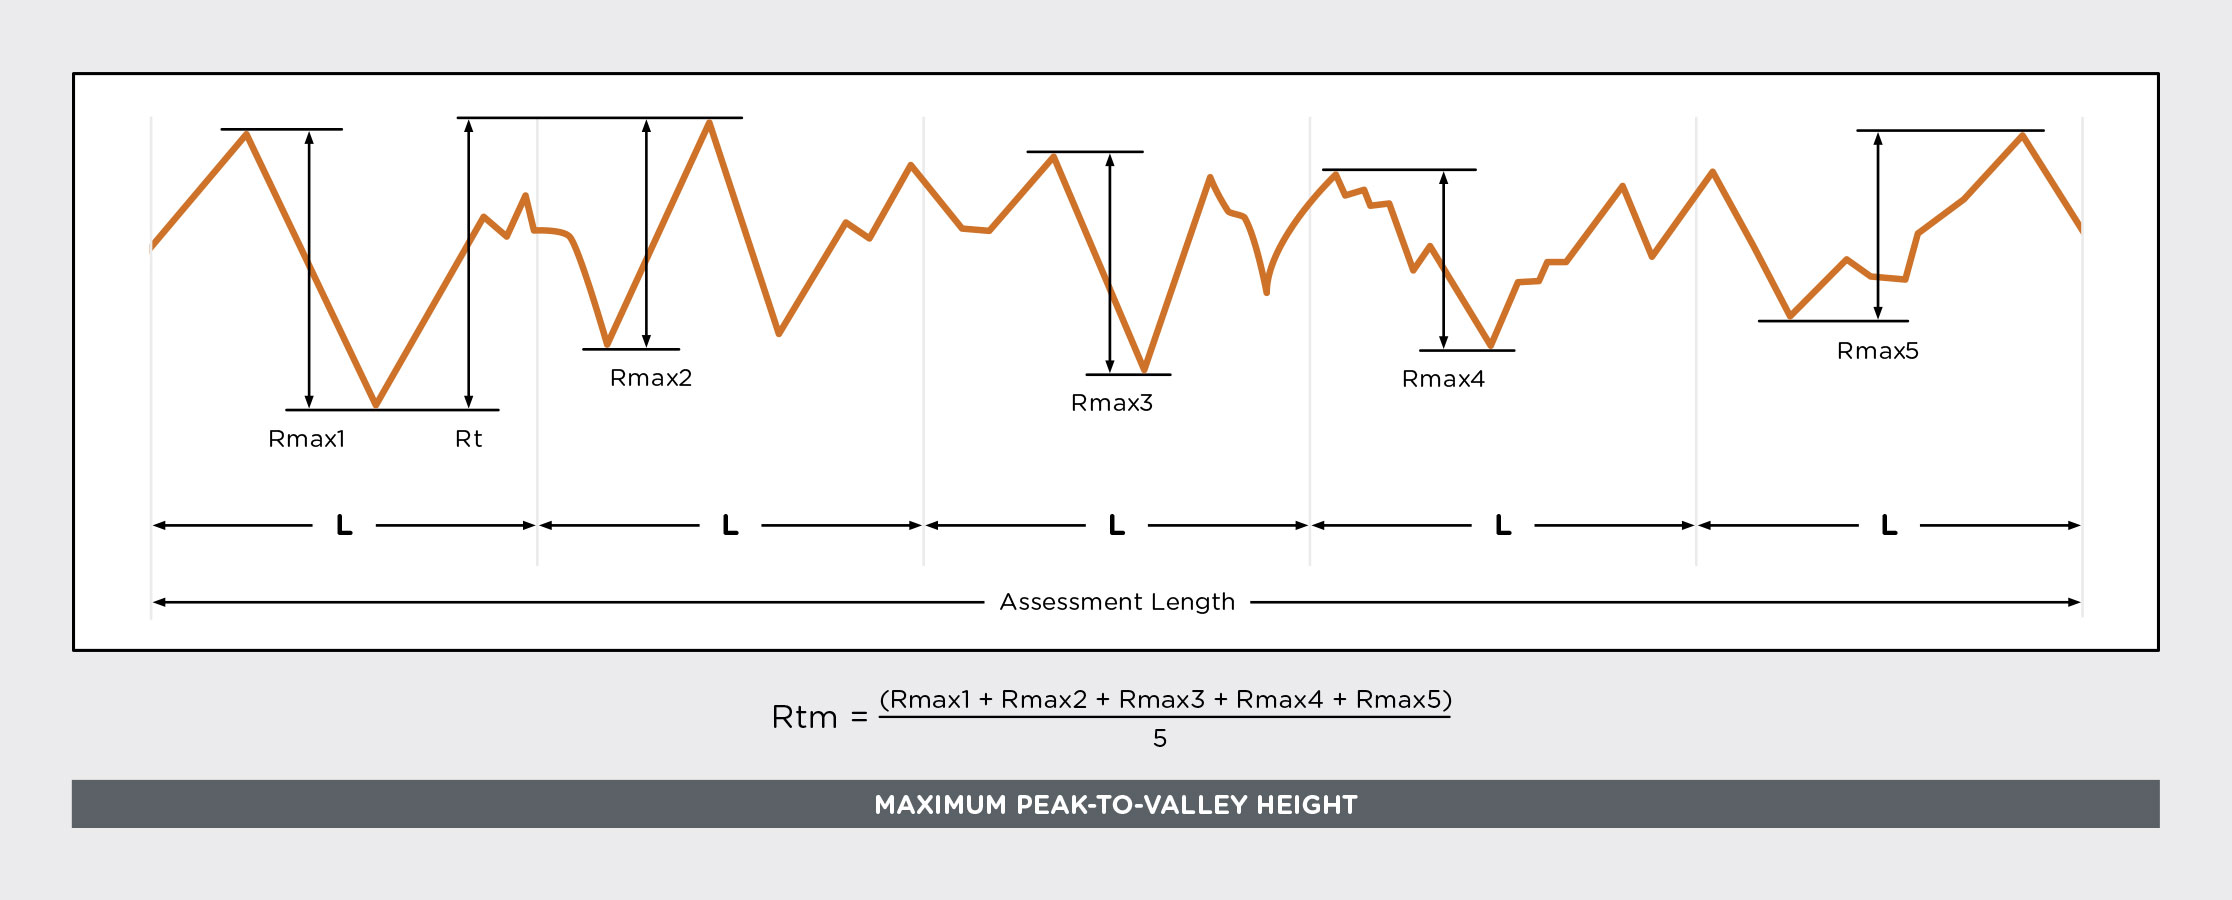
Rt is the maximum peak-to-valley height within the assessment length. Rmax is the maximum peak-to-valley height within a sampling length. The usual practice is to determine the average (Rtm) of five consecutive sampling lengths.

